Vixen | A leading manufacturer of astronomical telescopes and binoculars
Program Update Information on STAR BOOK TEN Update Information
The latest update program is available for your STAR BOOK TEN.
Program Update
Ver.5.40 (May 18, 2026)

- Fixed an issue where the mount would unintentionally return to the home position due to security software or other programs running while connected to a network.
Program correction
*If the program version of the STAR BOOK TEN controller is already Ver. 5.30 or later, there is no need to install it. The installed latest version will be shown on the “Initial Setup” screen that is displayed after turning on the STAR BOOK TEN controller.
Update Procedure
Before starting update
First, you need to download the update program available from Vixen’s website to your PC. Connecting your STAR BOOK TEN to the PC with a LAN crossover cable by one to one connection makes you ready for the update.
Use a power supply that is for the SX-series or AXD equatorial mount for the update.
Make sure that you have a stable power supply for your PC to transfer the update program.
The STAR BOOK TEN may fail to reboot if the power supply is turned off during the update. In that case, ask your local Vixen dealer for repair (It is chargeable to you). All your data stored in the STAR BOOK TEN may be lost after repair.
You may have to alter the network settings in your PC for the update. Please record the original settings in the PC before changing them for the update.
Requirements
- STAR BOOK TEN Controller
- PC that can be connected to the network via ETHERNET (LAN connection)
- Crossover LAN cable
- Power supply to operate the STAR BOOK TEN Controller
- PC used to control the STAR BOOK TEN Controller ※
- Necessary PC operating environment:
- Compatible OS: Either XP Home Edition, XP Professional, Vista, 7 Home Edition, 7 Professional, 7 Ultimate, 8, 8 Pro, 8.1, 8.1 Pro, or Microsoft Windows 10
- Web Browser: under environment of respective operating system recommended by Microsoft
- CPU: under environment of respective operating system recommended by Microsoft
- RAM: under environment of respective operating system recommended by Microsoft
- LAN: 10BASE-T/100BASE-T
How to install the Update Program
Click the button below to download the latest program to your computer in advance.
Update Program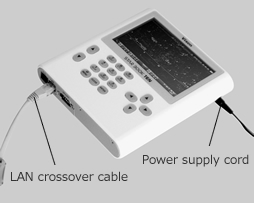
Some data such as observing locations and defined by user that are stored in the STAR BOOK TEN may be initialized as a result of the update. You should write down your current settings before you begin to update.
Directly connect the STAR BOOK TEN to the PC with a LAN crossover cable. ※Do not power on the STAR BOOK TEN and PC at this early stage.
Power up the STAR BOOK TEN by directly plugging the 12V power cable with center plus polarity into the unit. Turn on the PC.
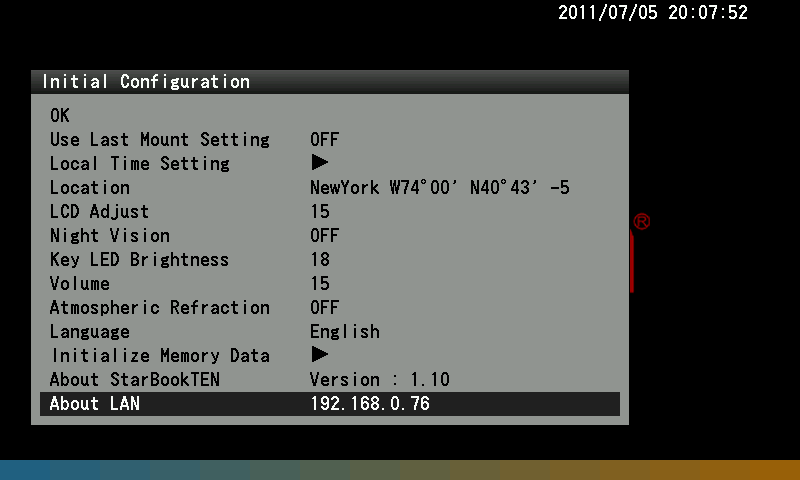
Check the firmware version in your STAR BOOK TEN with the “Initial Configuration” menu that appears on the initial screen.


Wait for a period of one minute as the STAR BOOK TEN and PC will automatically acquire information on networking.
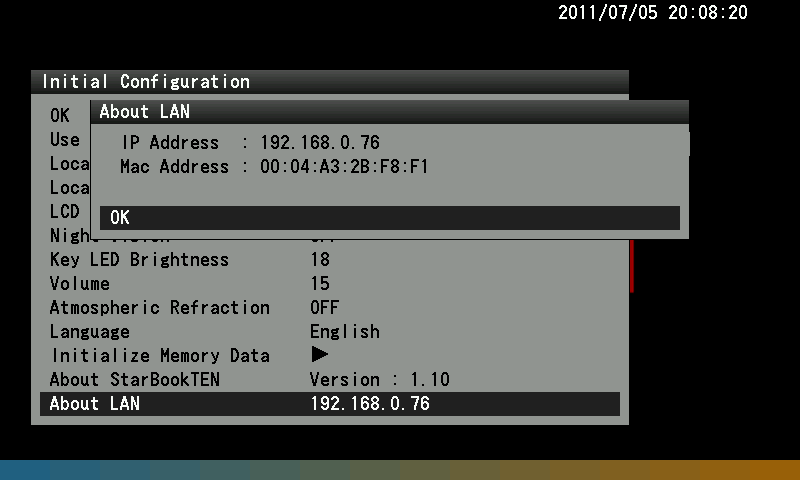
The “Initial Configuration” menu appears on the screen of the STAR BOOK TEN. Choose “About LAN” and confirm IP address.
Never disconnect the power supply cord for the STAR BOOK TEN and the LAN crossover cable while the STAR BOOK TEN is in communication with the PC. This could result in unrecoverable damage.
The IP address may differ id the STAR BOOK TEN is connected indirectly through a network or improper set up of the OS.
If the connection to the PC does not finish, the message “Waiting…” will be displayed instead of the IP address. Or if the connection ends in failure, the message “Disconnected” will be displayed. If this is the case, wait a little while or make sure that the LAN crossover cable is connected securely.
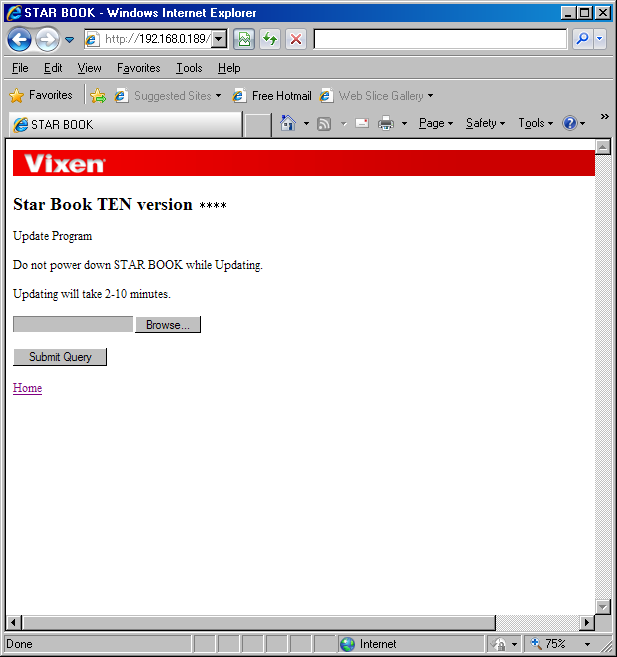
Open Internet Explorer (or your internet browser) and enter IP address you obtained in the above in the address bar to display an entry page.
Example: If the IP address is “192.168.0189”, put http://192.168.0.189 in the address bar.
Note: Change the setting to have the address bar appear if it is hidden on your PC.

The initial screen shown on the left appears on the PC screen. Click “Update Program” to continue.
“Update Program” screen is displayed and click on the “Browse” button.
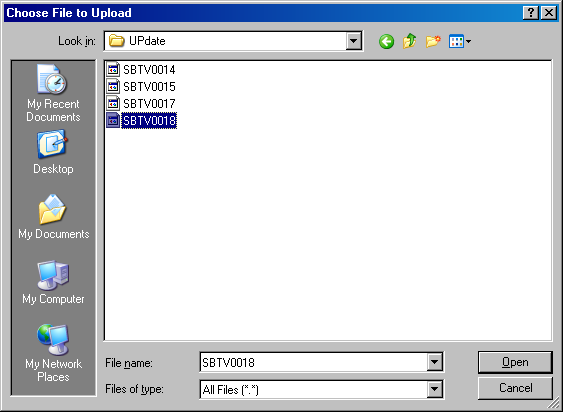
It opens the holder that contains the downloaded program file for updating. Select the program file and click on the “Open” button.
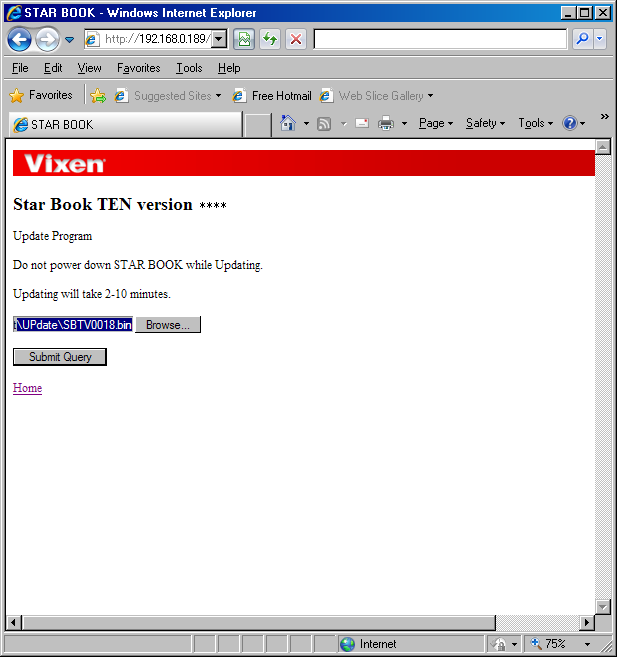
Click on the “Submit Query” button for sending the program file.
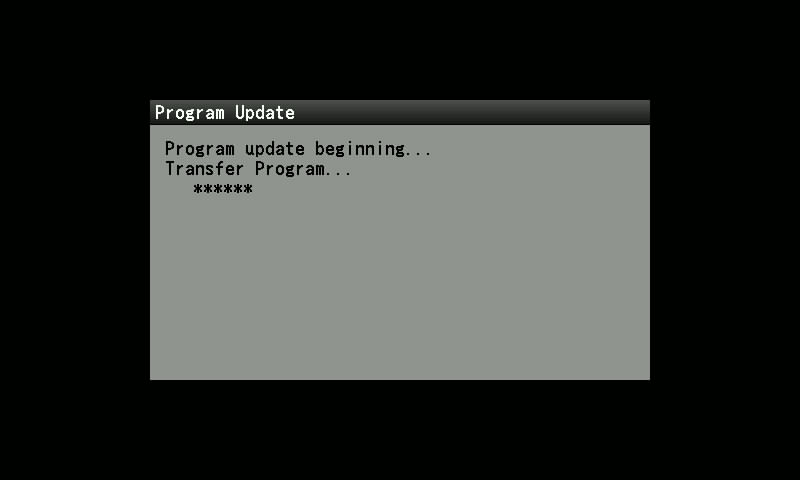


The STAR BOOK TEN starts updating. Progress of the update is displayed on the screen of the STAR BOOK TEN during the communication with the PC.

You will see the “Update Finish” message on your screens both the STAR BOOK TEN and the PC at the end of successful update. Unplug the power supply cord of the STAR BOOK TEN and then plug it in again to reboot.
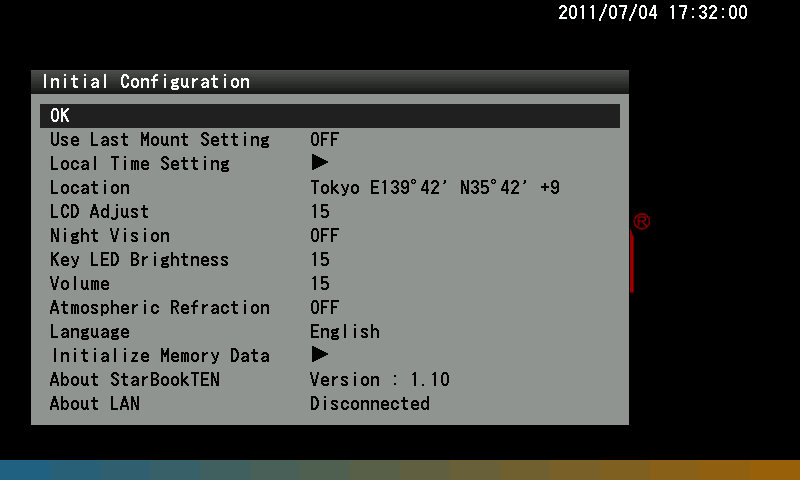
In the initial configuration menu, go into “About STAR BOOK TEN” and confirm the updated version to finish. Restore the settings on the PC if changed.
-
Procedure in Windows 10
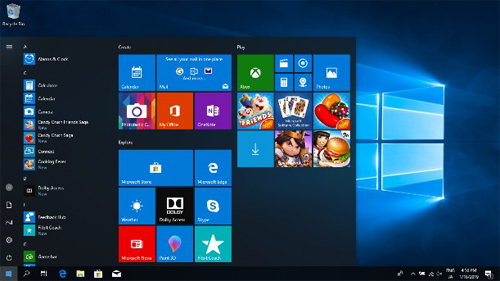
Click “Settings” on the lower left side of the start screen to open the “Settings” screen.
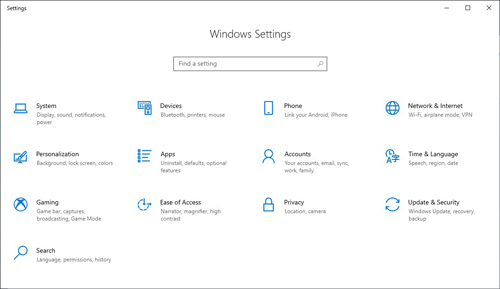
Click “Networks & Internet” to display “Network & Internet” screen.
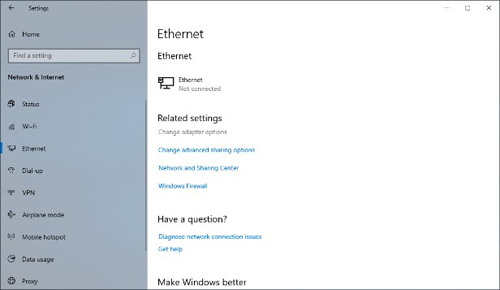
Select “Ethernet” and click “Change adapter options” in the Related settings to open “Network connections” screen.
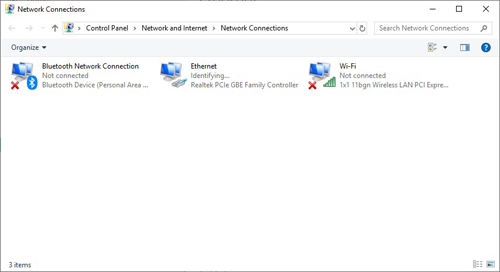
Click “Ethernet” to display “Ethernet status” screen.
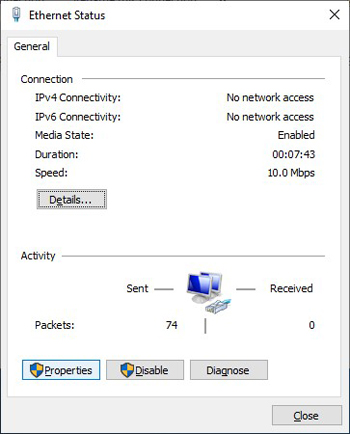
Click “Properties” to open “Ethernet properties” screen.
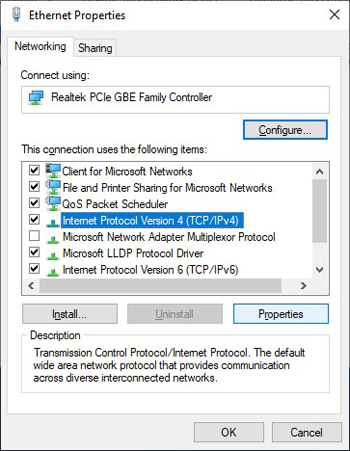
Select “Internet Protocol Version 4 (TCP/IPv4)” in “This connection uses the following items:” dialog box and click “Properties”. The “Internet Protocol Version 4 (TCP/IPv4)” screen appears.
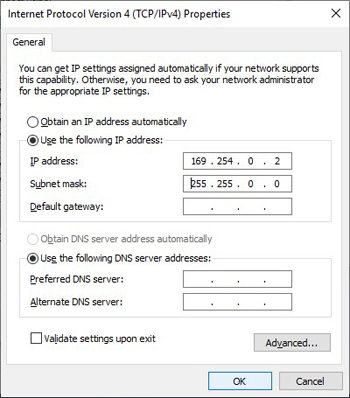
Mark check boxes for “Use the following IP address (S):” and enter the IP address and Subnet Mask numbers as follows:
IP address : 169.254.0.2
Subnet Mask : 255.255.0.0
Select “OK” to fish the settings. Proceed to the download procedure of update program. -
Procedure in Windows 8
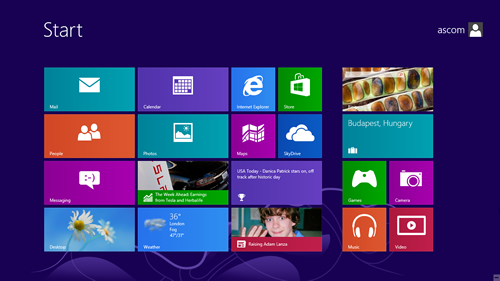
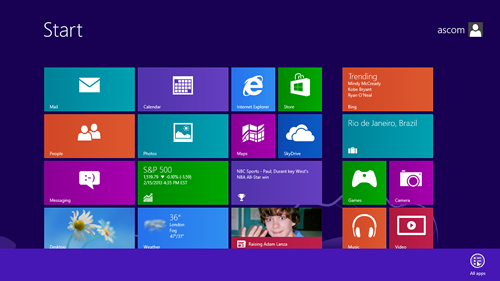
Right-click on the background in the start up screen. Click “All apps” in the bottom right of the screen and display every application.
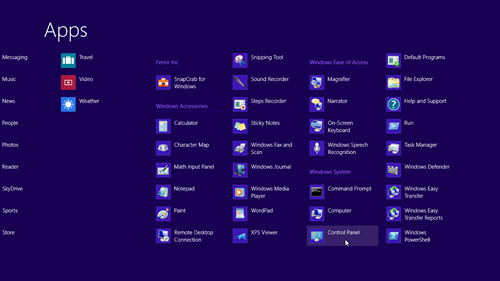
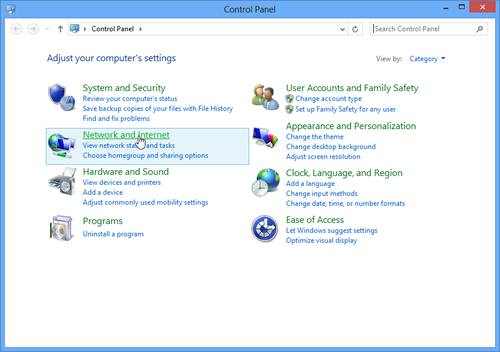
Select “Control Panel” and go to “Network and Internet”.
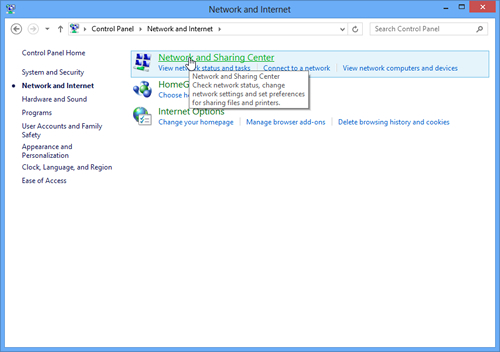
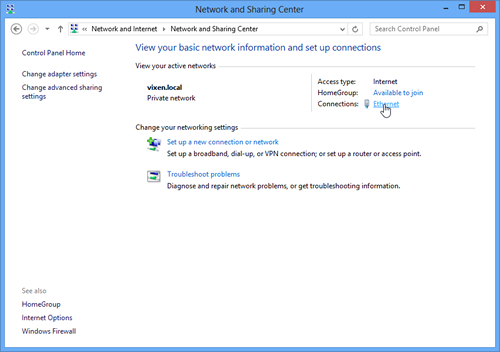
Click on “Network and Sharing Center” The “View your basic network information and set up connections” screen is displayed.
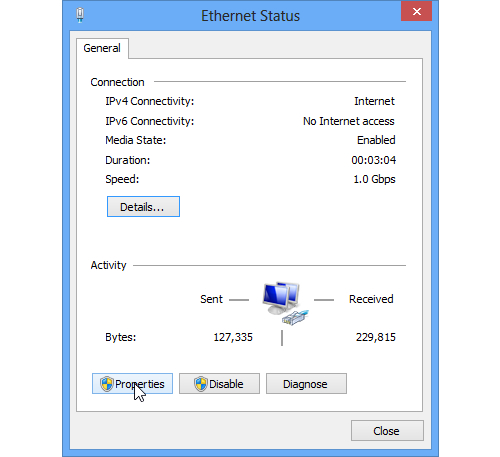
Click on “Ethernet” to go to “Ethernet Status”. Click the Properties button to display the “Ethernet Properties” dialog box.

In the window of “This connection uses the following items”, scroll down the cursor to “Internet Protocol version 4 (TCP/IPv4)” to select. Click the Properties button in the lower right of the dialog box.

“Internet Protocol Version 4 (TCP/IPv4) Properties” is displayed. Mark check boxes for “Use the following IP Address” and enter the IP address and Subnet Mask numbers as follows :
IP Address : 169.254.0.2
Subnet Mask : 255.255.0.0
If the update is not successful in the above procedure, please confirm the settings on your PC.
Notice
Newly added functions in the update program are downloaded as a package. It is not possible to designate the installation of a specific function if the update program contains a number of functions.
Disclaimer
In case of any damage experienced by a customer when installing or using this software or any charge sent by a third party to a customer due to the damage, Vixen or their dealer do not take responsibility unless the customer is not responsible and Vixen or their dealer was negligent.
Update History
If you perform the latest update, all the events will be improved.
| Update Start Date | Update Contents |
|---|---|
| December 1, 2025 |
|
| April 4, 2024 |
|
| May 15, 2019 |
|
| November 30, 2018 |
|
| December 20, 2016 |
|
| – |
|
| – |
|
| – |
|
| – |
|
| – |
|
| – |
|
| – |
|
| – |
|
| – |
|
| – |
|
| – |
|
| – |
|
| – |
|
| – |
|
| – |
|
| – |
|
| – |
|
| – |
|
| – |
|
| – |
|
| – |
|
| – |
|
|
|
|
|
|
|
|